Arch Linux And Openbsd Dual Boot Part Two
Beginning the OpenBSD Setup
Now we have the setup down for Arch Linux we need to configure the OpenBSD side of things. Head to openbsd.org and grab the install.iso. At time of writing this is install77.iso.
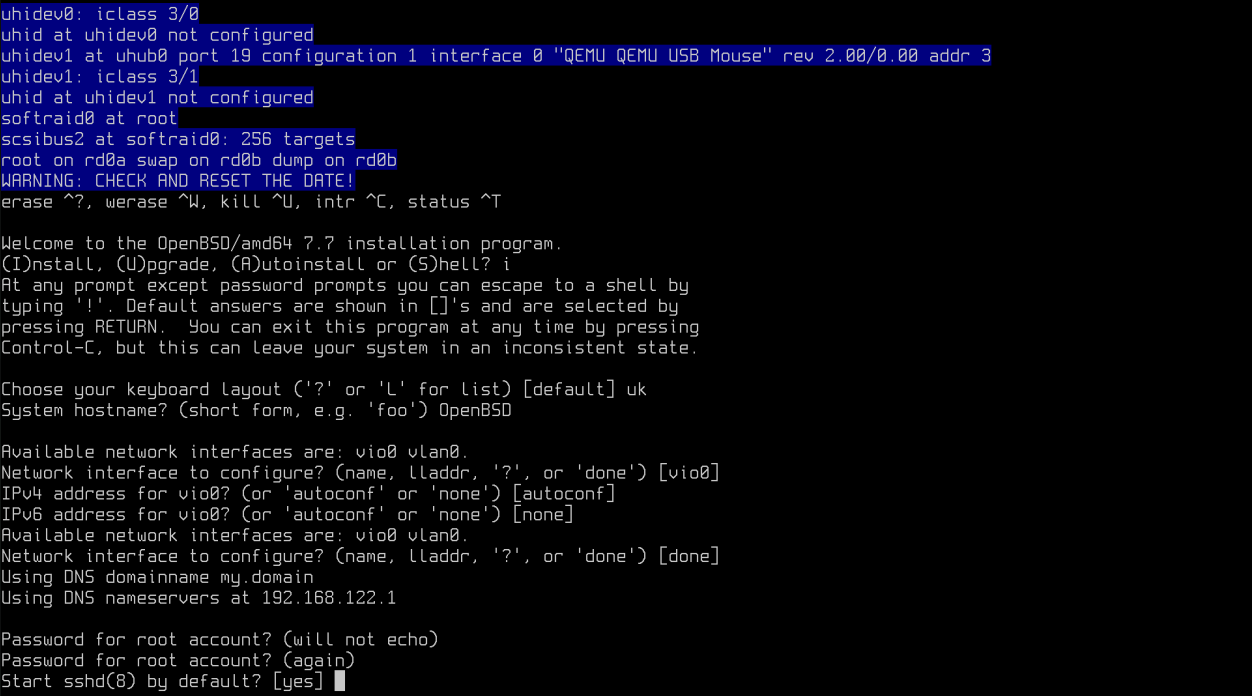
Once you have the installer booted you should see the following installation screen.
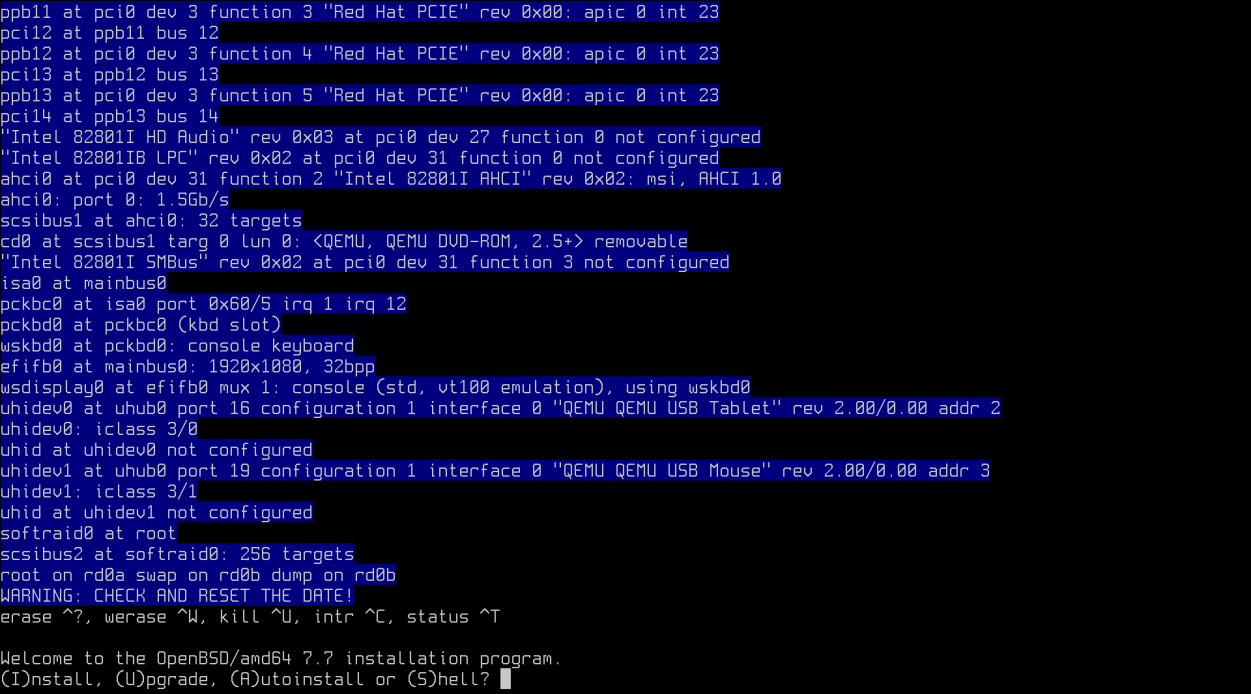
Press “I” on the keyboard to begin the installer.
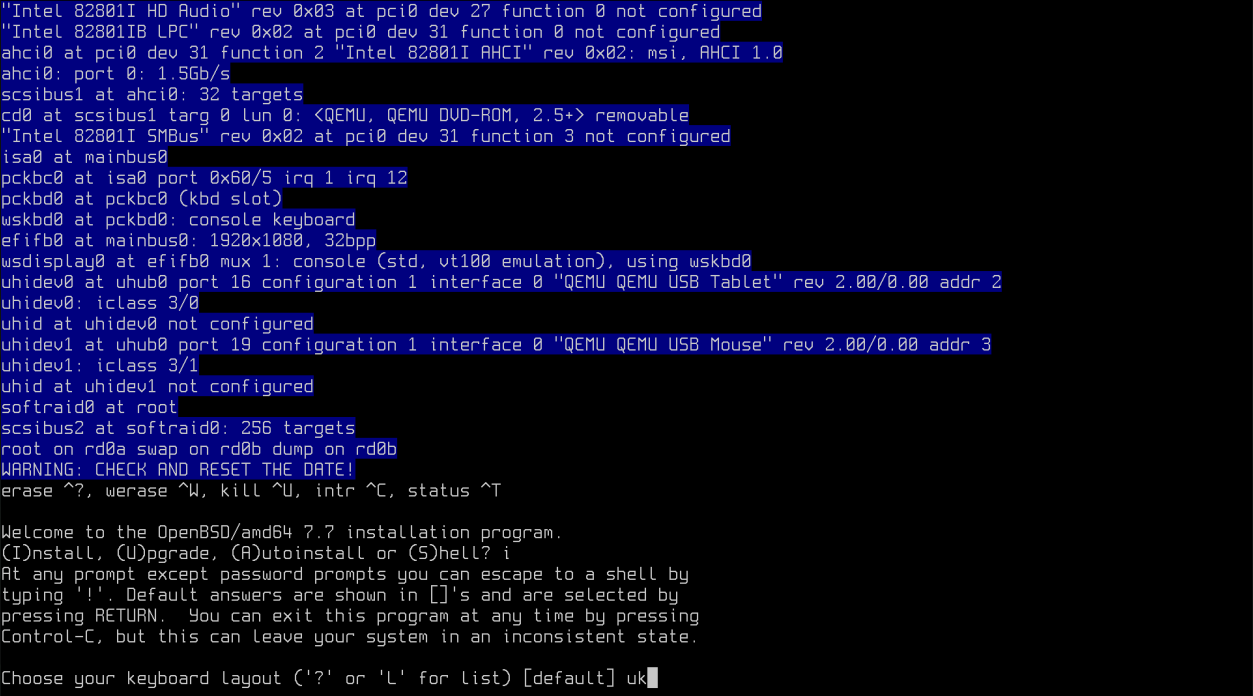
You will be prompted to select keyboard layout below which for me is “uk” put type “?” to see a list. Once you know type it in and hit enter.
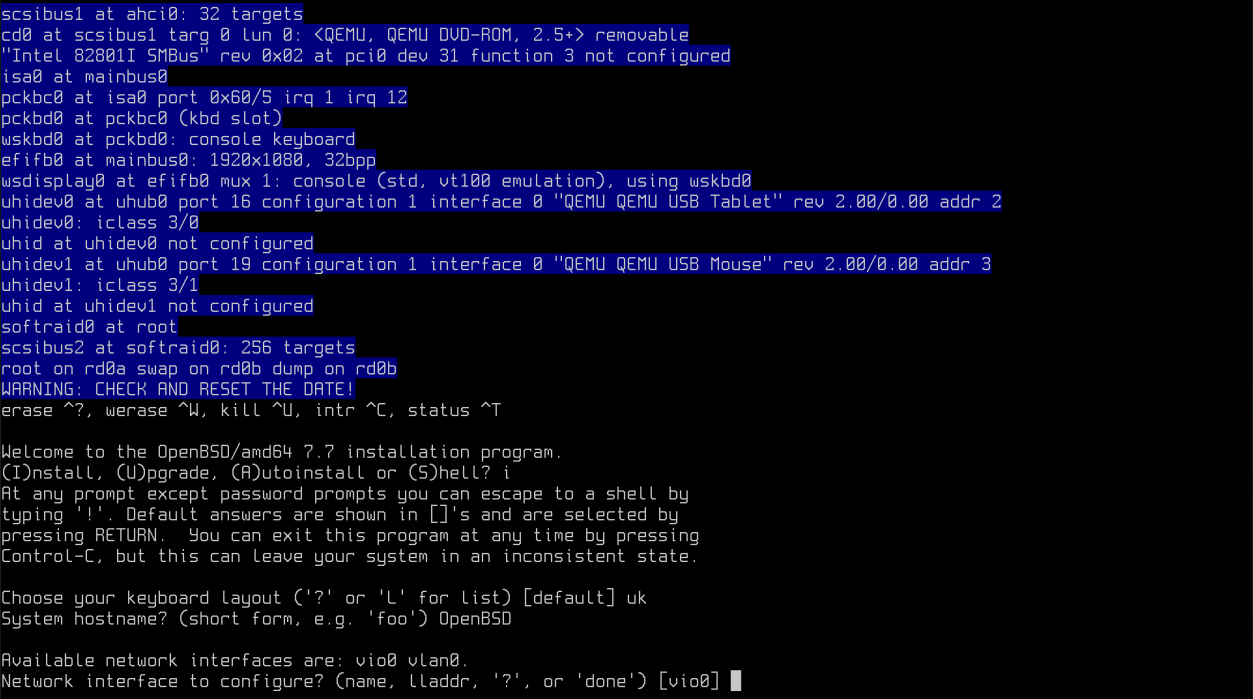
You will then be prompted for a system hostname. Enter any hostname you like and hit enter again.
Here you will need to select your network interface. As I am in a test VM I hit enter to continue.
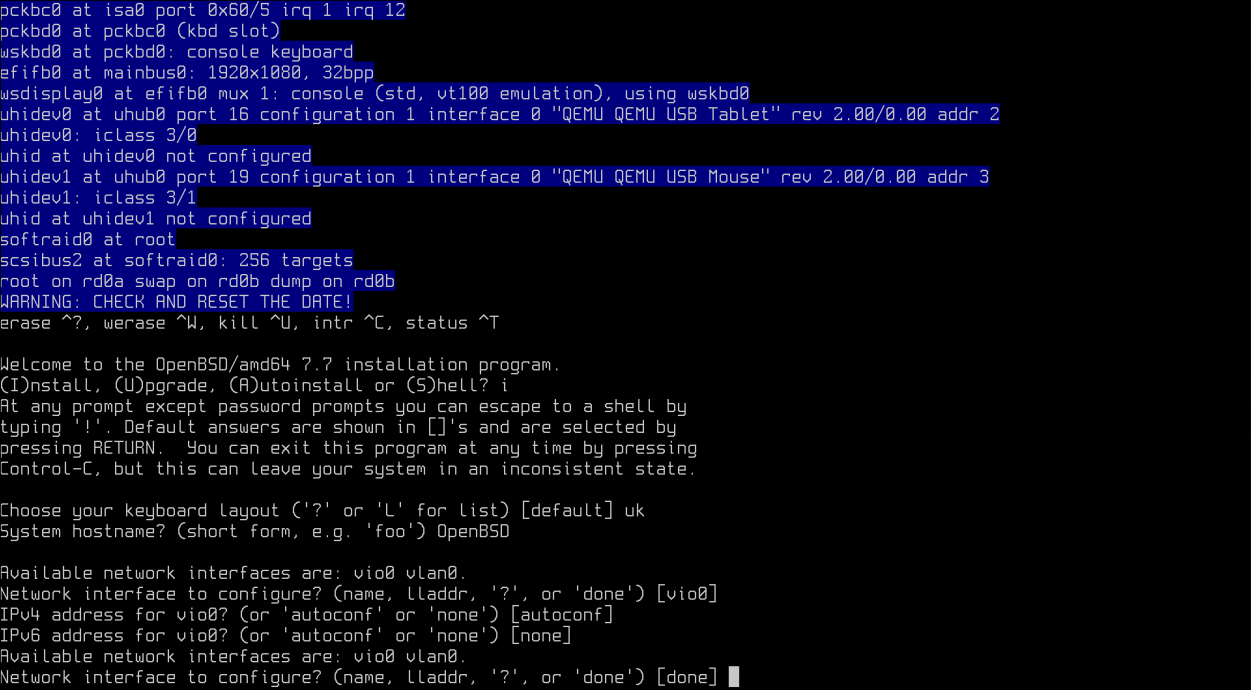
I hit enter on the next step for autoconf using DHCP and hit enter again on IPv6 as I don’t need it. Then enter again to complete networking.
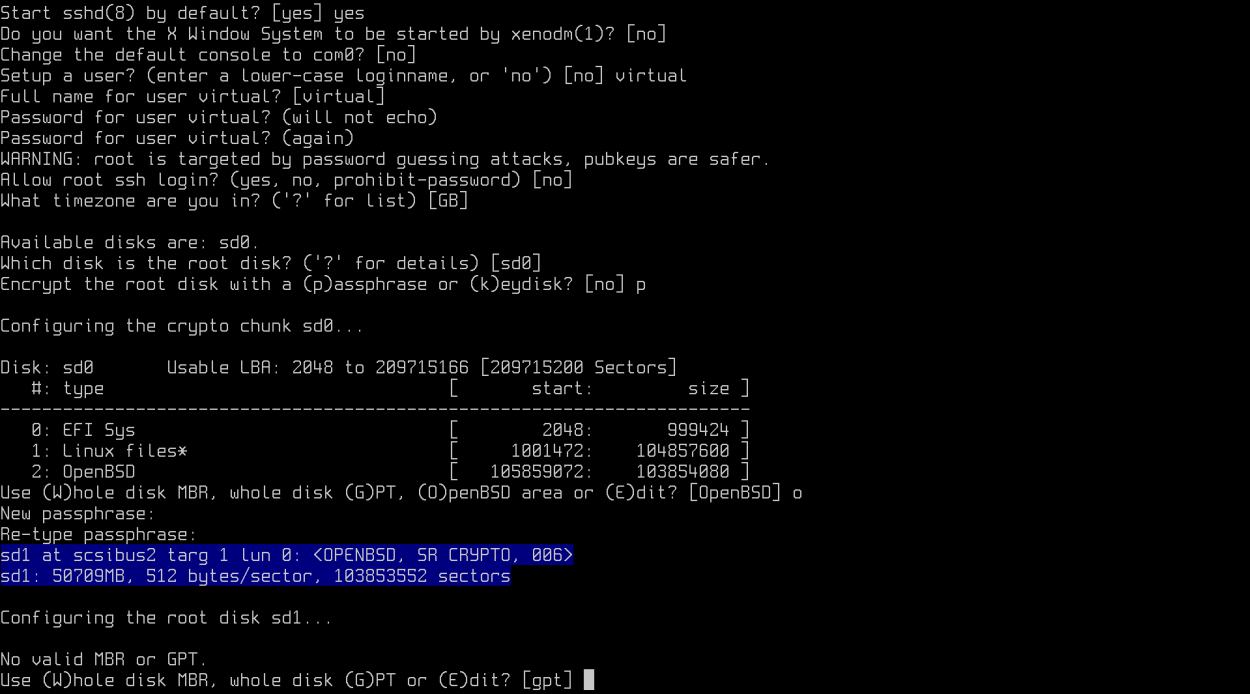
Enter a root password and also start SSHd if you want by typing in YES and hitting enter.
If you want a graphical environment by default after starting OpenBSD enter “YES” and hit enter for xenodm however I leave the default as no as I am testing.
I leave the default option for com0 to “no”
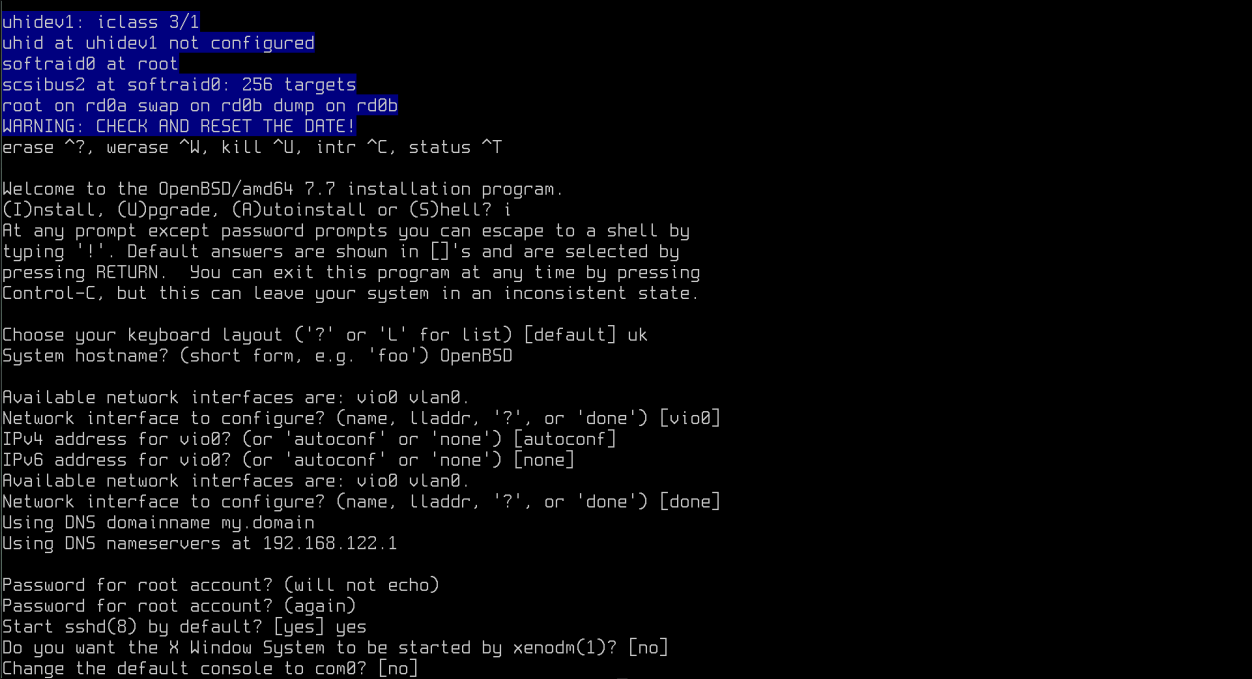
Follow the steps if you’d like to setup a user. I won’t cover this as it’s straight forward really along with the other questions following until we get to which disk we’d like to use. Again I keep mine as default as I am in a test environment.
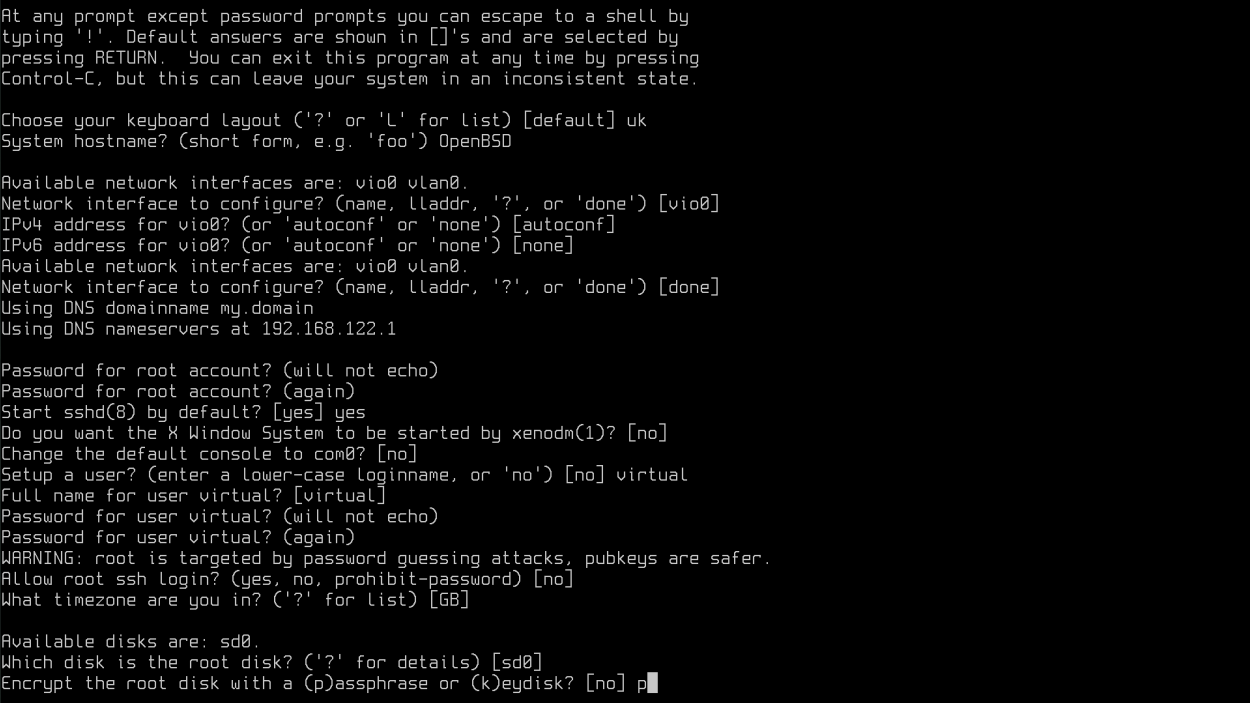
When prompted for a passphrase hit “p” and enter. You’ll be prompted shortly for that after the next question.
Now comes an important step. In the last part of the guide in part one we specified in Arch Linux’s installer that one partition would be “OpenBSD Data” this comes in clutch here as we can simply press the appropriate letter at this step which is “o” for OpenBSD Data. Case doesn’t seem to matter as evidenced in my screenshot.
You’ll also be prompted for the encryption password after and here is a fair warning in that the utility when unlocking the disk when booting OpenBSD seems to be locked to a US keyboard layout so I would avoid characters that conflict with that. I haven’t yet found a way to change this so just please keep that in mind.
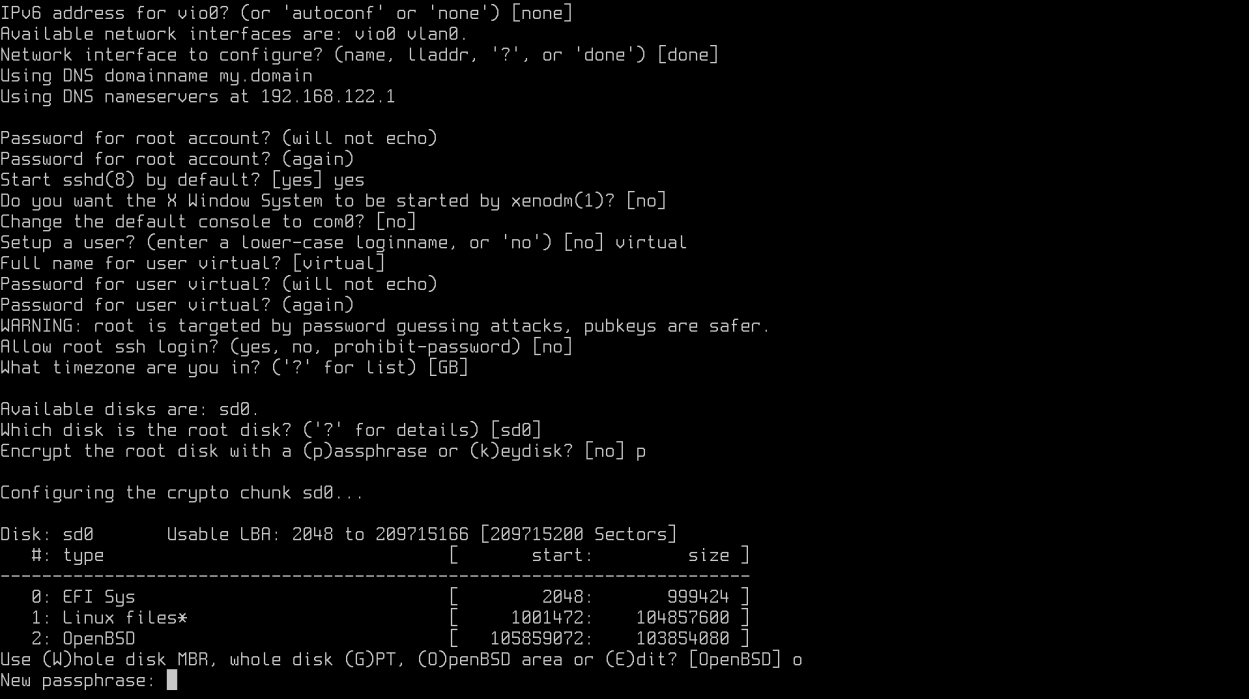
After this we will be prompted for MBR or GPT. I stick with the default GPT and hit enter.
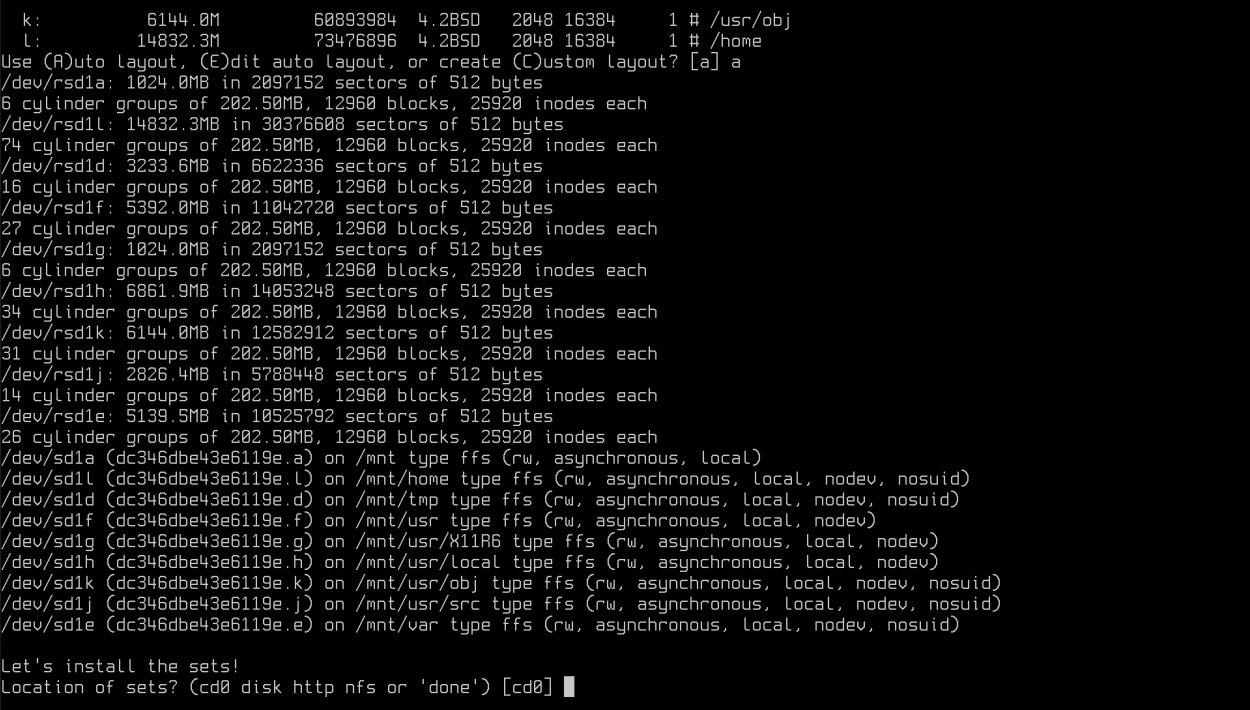
In the next step we’ll be given an automatic partition layout of the disk. Personally I haven’t messed around with this and the automatic layout usually get’s it right so I hit enter here using the default “a” option for auto layout.

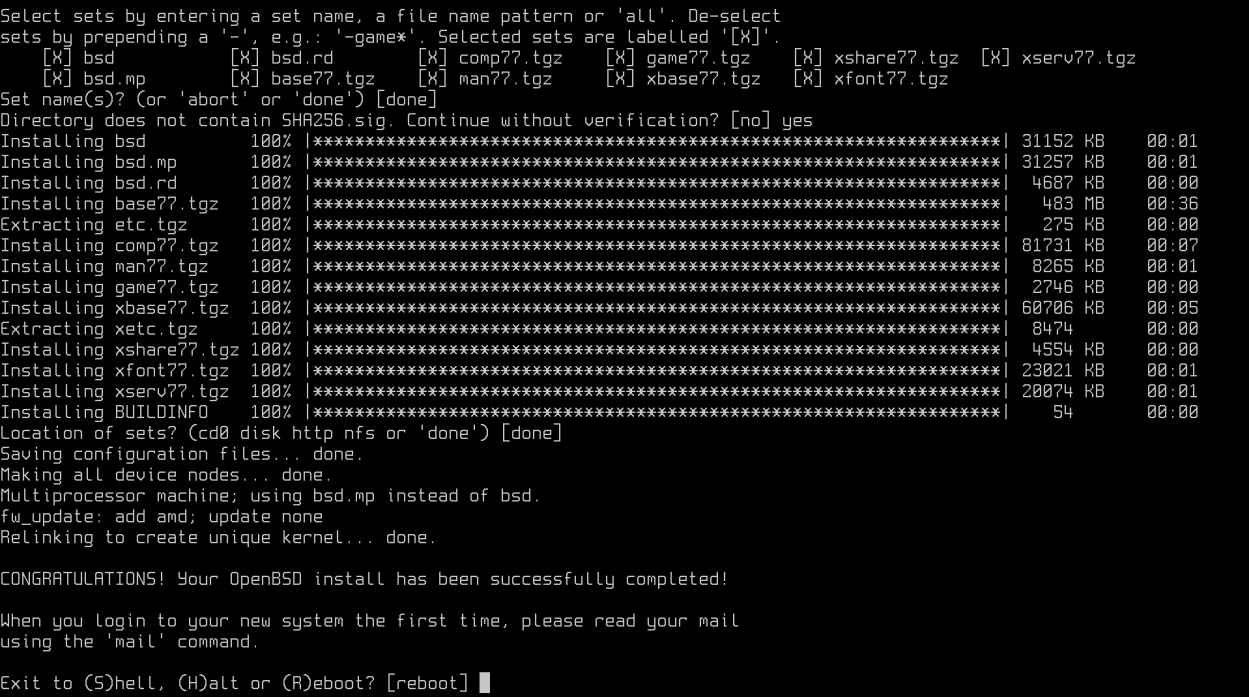
After we’ll be prompted to install the sets. As they are included with the .iso hit enter to install from local install media and enter again for the path to the sets and finally yes again to confirm.
Once the .tgz files have finished extracting and installing the installer will automatically install some firmware and you’ll be prompted with an option. We’ll need to go into the shell using option “s” as we need to make yet another config change to rEFInd.
Once in the shell enter mkdir /mnt/esp to create a temporary directory and then mount into it using mount_msdos /dev/sdX1 /mnt/esp replacing X with your drive letter. In my instance this was mount msdos /dev/sd0i /mnt/esp and I was able to locate this with disklabel sd0 which will give you the drive letter character for the MSDOS file system we need to mount (EFI partition we made in Arch)

We may need to create a directory for OpenBSD if it doesn’t exist already with mkdir /mnt/esp/EFI/OpenBSD and then copy the BOOTX64.EFI with mv /mnt/esp/EFI/BOOT/BOOTX64.EFI /mnt/esp/EFI/OpenBSD/BOOTX64.EFI
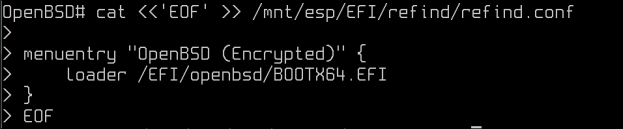
We then need to edit the config for rEFInd but there is a catch as the ISO doesn’t have a text editor of any sort… We have to get creative with
cat <<'EOF' >> /mnt/esp/EFI/refind/refind.conf

menuentry "OpenBSD (Encrypted)" {
    loader /EFI/OpenBSD/BOOTX64.EFI
}
EOF
Check that we can see this with cat /mnt/esp/EFI/refind/refind.conf and if we can we can safely unmount the partition at this stage and reboot.
umount /mnt/esp/ and then reboot
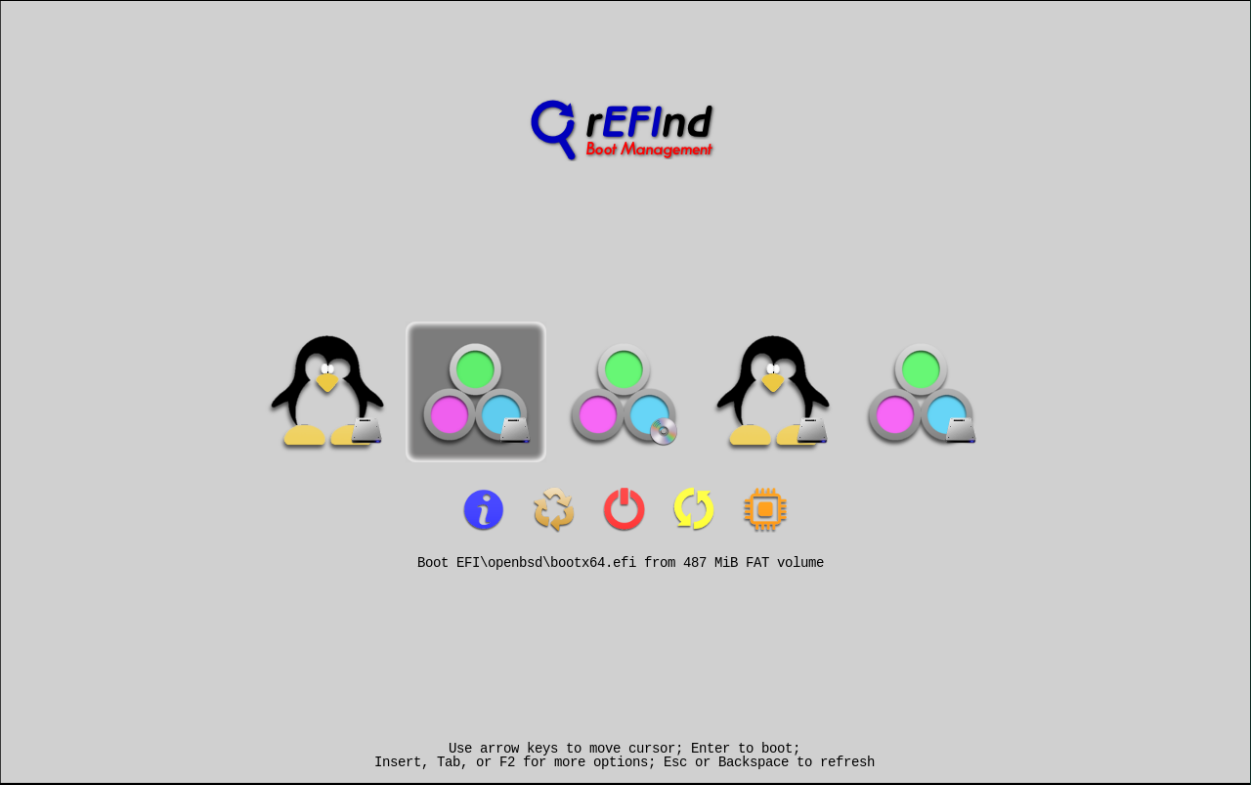
Remove installation media at this point and we should get back into rEFInd and see our menu. If not you may need to look at the EFI boot menu in your BIOS and put rEFInd at the top.
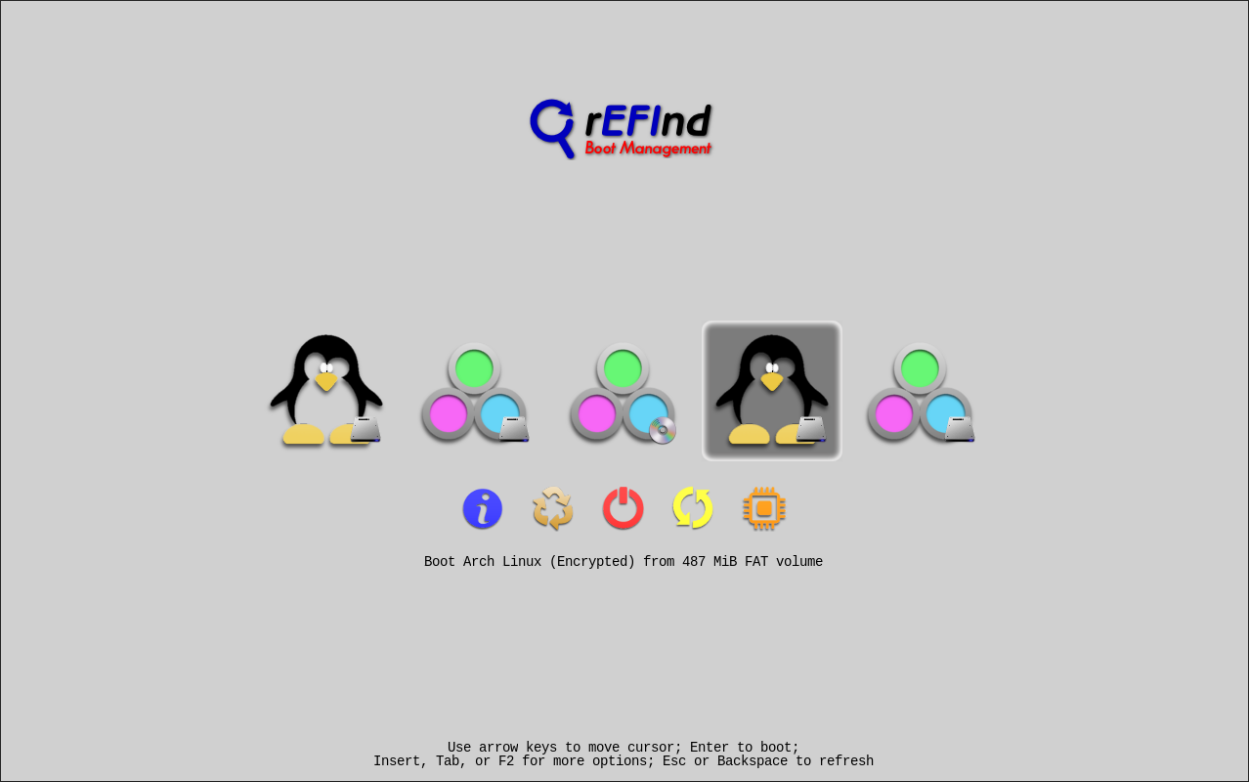
If all has gone well you should see an entries in rEFInd with one for OpenBSD:
with another for Arch Linux:
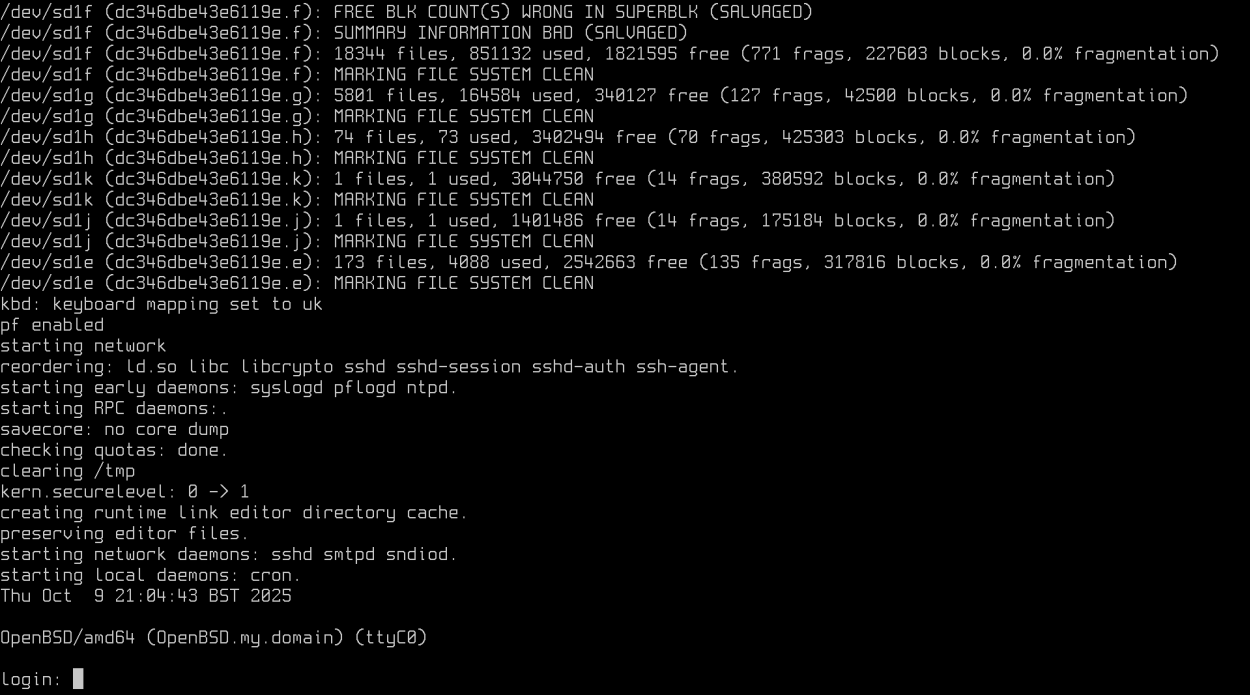
If all is successful booting into OpenBSD as it’s our newest addition should great us with a password. Once entered hit enter again on the boot> prompt to begin the OpenBSD boot process!
If there are issues with OpenBSD you can simply boot into the Arch install and edit the rEFInd configuration at /boot/EFI/refind/refind.conf and check for any typos or issues.